There’s something timeless about the aroma of roasting chestnuts on a crisp autumn day. With their rich, sweet flavor and impressive nutritional profile, chestnuts remain a fall and winter staple.
While chestnuts require a bit of care after harvest, the payoff is worth the effort. Don’t worry; we’ll help you catch up on the essentials right now.
Prepare for the next season by following our guide to storing and curing chestnuts after harvest.
Why Chestnuts Are Worth the Effort
Chestnuts are one of the few nuts that contain less fat and more carbohydrates, making them a naturally sweet snack that’s also versatile in cooking.
They can be deliciously roasted, boiled, ground into flour, or puréed into soups and desserts. Rich in vitamin C, fiber, potassium, and antioxidants, chestnuts are as nutritious as they are delicious.
But what truly sets them apart is their seasonal charm—harvesting and preparing chestnuts is still a beloved activity after many, many years.
However, chestnuts differ from other nuts in one key way: they have a high moisture content. This means they’re highly perishable and require proper post-harvest care to maintain their flavor and texture
Without the right steps, chestnuts can spoil quickly, losing their sweetness and firmness. That’s why understanding the process of harvesting, curing, and storing them is essential.
The Ideal Time to Harvest Chestnuts
Timing is everything when it comes to harvesting chestnuts.
The best time to collect these seasonal gems is between September and November, depending on your region and climate. Chestnuts are ready to harvest when their spiny green burrs naturally split open and fall to the ground.
Unlike some fruits and nuts, chestnuts don’t ripen after being picked, so it’s crucial to wait until they drop naturally.
Selecting the Best Chestnuts
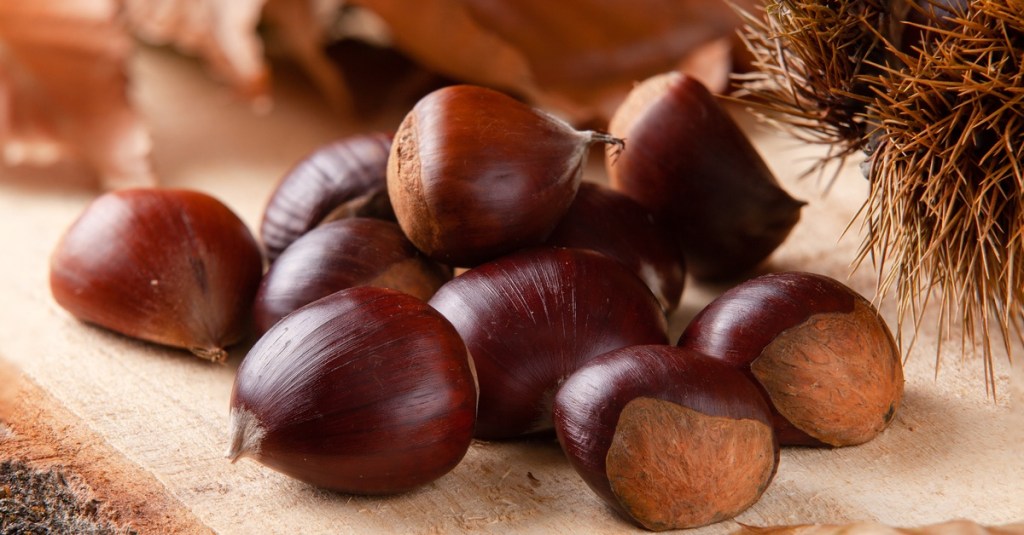
When foraging for chestnuts, look for glossy, firm, dark brown nuts.
Avoid collecting ones that appear dull, cracked, or have visible holes, as these are signs of overripe or pest-infested chestnuts. Be sure to wear gloves while handling the spiny burrs, which can be quite sharp.
Gently remove the nuts from the burrs and collect them in buckets or breathable bags.
Harvesting chestnuts promptly after they drop is important. Leaving them on the ground too long increases the risk of mold, pests, and spoilage.

Sorting: The First Step to Freshness
Once you’ve gathered your chestnuts, the next step is sorting.
Sorting is essential to ensure you’re only keeping the best-quality nuts for curing and storage. Start by removing debris like leaves, twigs, and empty burrs.
Then, inspect each chestnut carefully.
Discard any that feel soft or spongy, as this is a sign of decay. You should also avoid any nuts with small holes, as these holes can be signs of an insect infestation.
After sorting, give the good chestnuts a quick rinse in cool water to remove any dirt or debris. Spread them out on a clean, dry surface in a well-ventilated area and allow them to air dry completely.
This step is crucial, as excess moisture can lead to mold during curing and storage.
Curing Chestnuts for Maximum Sweetness
Curing is a vital process that enhances the flavor of chestnuts by converting their natural starches into sugars. Without curing, chestnuts may taste bland or starchy, so this step is key to bringing out their natural sweetness.
There are two main methods for curing chestnuts: air curing and water curing. Each method has its own benefits and suits different needs.
Air Curing
Air curing is the most straightforward method and is ideal for home growers. Spread the chestnuts in a single layer in a cool, dry, well-ventilated space, such as a garage or basement.
Turn them occasionally to ensure even curing. This process typically takes three or four days, depending on the humidity and temperature. The nuts will gradually become sweeter and more flavorful over time.
Water Curing
For a quicker option, water curing is an effective alternative. Soak the chestnuts in hot water for 20 minutes.
After soaking, immediately cool the chestnuts in cold water, then dry them thoroughly before moving on to storage. Whichever method you choose, curing chestnuts properly is essential for extending their shelf life and enhancing their taste.
Storing Chestnuts to Keep Them Fresh
Once you cure them, correctly store chestnuts to maintain their freshness and flavor. Unlike other nuts, chestnuts are perishable and require cool, moist conditions to prevent them from drying out or spoiling.
Short-Term Storage
For short-term storage, place the cured chestnuts in a perforated plastic bag or a container with a slightly open lid.
Store them in the crisper drawer of your refrigerator, where the temperature and humidity levels are ideal. Chestnuts stored this way can last 2-3 weeks.
Long-Term Storage
If you’d like to store chestnuts for longer periods, freezing is the best option. Place the chestnuts in an airtight bag or container, and store them in the freezer for several months.
If you prefer to store cooked chestnuts, roast or boil them first, peel off the shells, and freeze the peeled nuts in an airtight container.
Cooked chestnuts are perfect for quick use in recipes or as a ready-to-eat snack.
Troubleshooting Common Issues
Our guide to storing and curing chestnuts after harvest would be incomplete without addressing potential problems.
Despite your best efforts, issues like mold, pests, and drying out can occasionally occur. Here’s how to address these common issues:
- Mold: Make sure chestnuts are completely dry before storage. Use ventilated bags or containers to allow air circulation. If mold develops, discard the affected nuts immediately.
- Pests: To avoid insect infestations, carefully inspect and sort the chestnuts after harvesting. Water curing can also help eliminate pests.
- Drying Out: If chestnuts become too dry, soak them in water for a few hours before use. Keep in mind that overly dried chestnuts may lose some flavor and texture.
Celebrate Chestnut Season
With a bit of time and care, you can enjoy chestnuts well beyond their harvest season.
Visit our chestnut tree nursery now to find various beautiful options worth planting.
From harvesting and curing to proper storage, following these steps ensures that your nuts remain sweet, flavorful, and ready to use for months. Whether you’re roasting them over an open fire or incorporating them into a gourmet recipe, chestnuts are a delicious way to celebrate the flavors of fall.
So roll up your sleeves, embrace the process, and savor the joy of chestnut season!

Leave a comment