If you have never heard of a medlar tree before, you are not alone. Medlar is one of those old-world fruits that feels like a hidden treasure. It is unusual, historic, a little quirky, and exactly the kind of tree that makes a backyard orchard feel more interesting. If apples, peaches, and pears are the familiar crowd, medlar is the fascinating relative who shows up with stories nobody else can tell.
That is part of the appeal. Medlar trees are not just productive fruit trees. They are conversation trees. They bring ornamental beauty in spring, attractive foliage through the growing season, and a late harvest that feels different from almost everything else in the garden. Medlar trees as cold-hardy, disease-resistant fruit trees with compact size, ornamental appeal, spring blooms, and a preference for full sun and well-drained soil, making them well suited for small gardens and edible landscapes.
If you are a beginner, the good news is that medlar trees are not difficult to understand once you know the basics. The key is planting them at the right time, choosing the right site, understanding the soil they like, following a smart planting method, and staying consistent during the first year. Do that, and you can give your tree an excellent start.
This guide walks you through everything you need to know about how to plant medlar trees for beginners. We will cover when to plant medlar trees, site selection, soil requirements, soil preparation, variety recommendations using the medlar trees currently offered by Ty Ty Nursery, pollination, how to plant step by step, why Nutra Pro 1st Year Fertilizer Paks are safer than granular fertilizer the first year, how to water after planting, when to remove first-year flowers, how to prune, common issues to watch for, and why Ty Ty Nursery is a strong place to buy medlar trees online. Ty Ty’s live medlar catalog currently includes three varieties: Breda Giant Medlar, Marron Medlar, and Royal Medlar, and all three are currently listed for USDA Zones 4 through 9.
What Is a Medlar Tree?
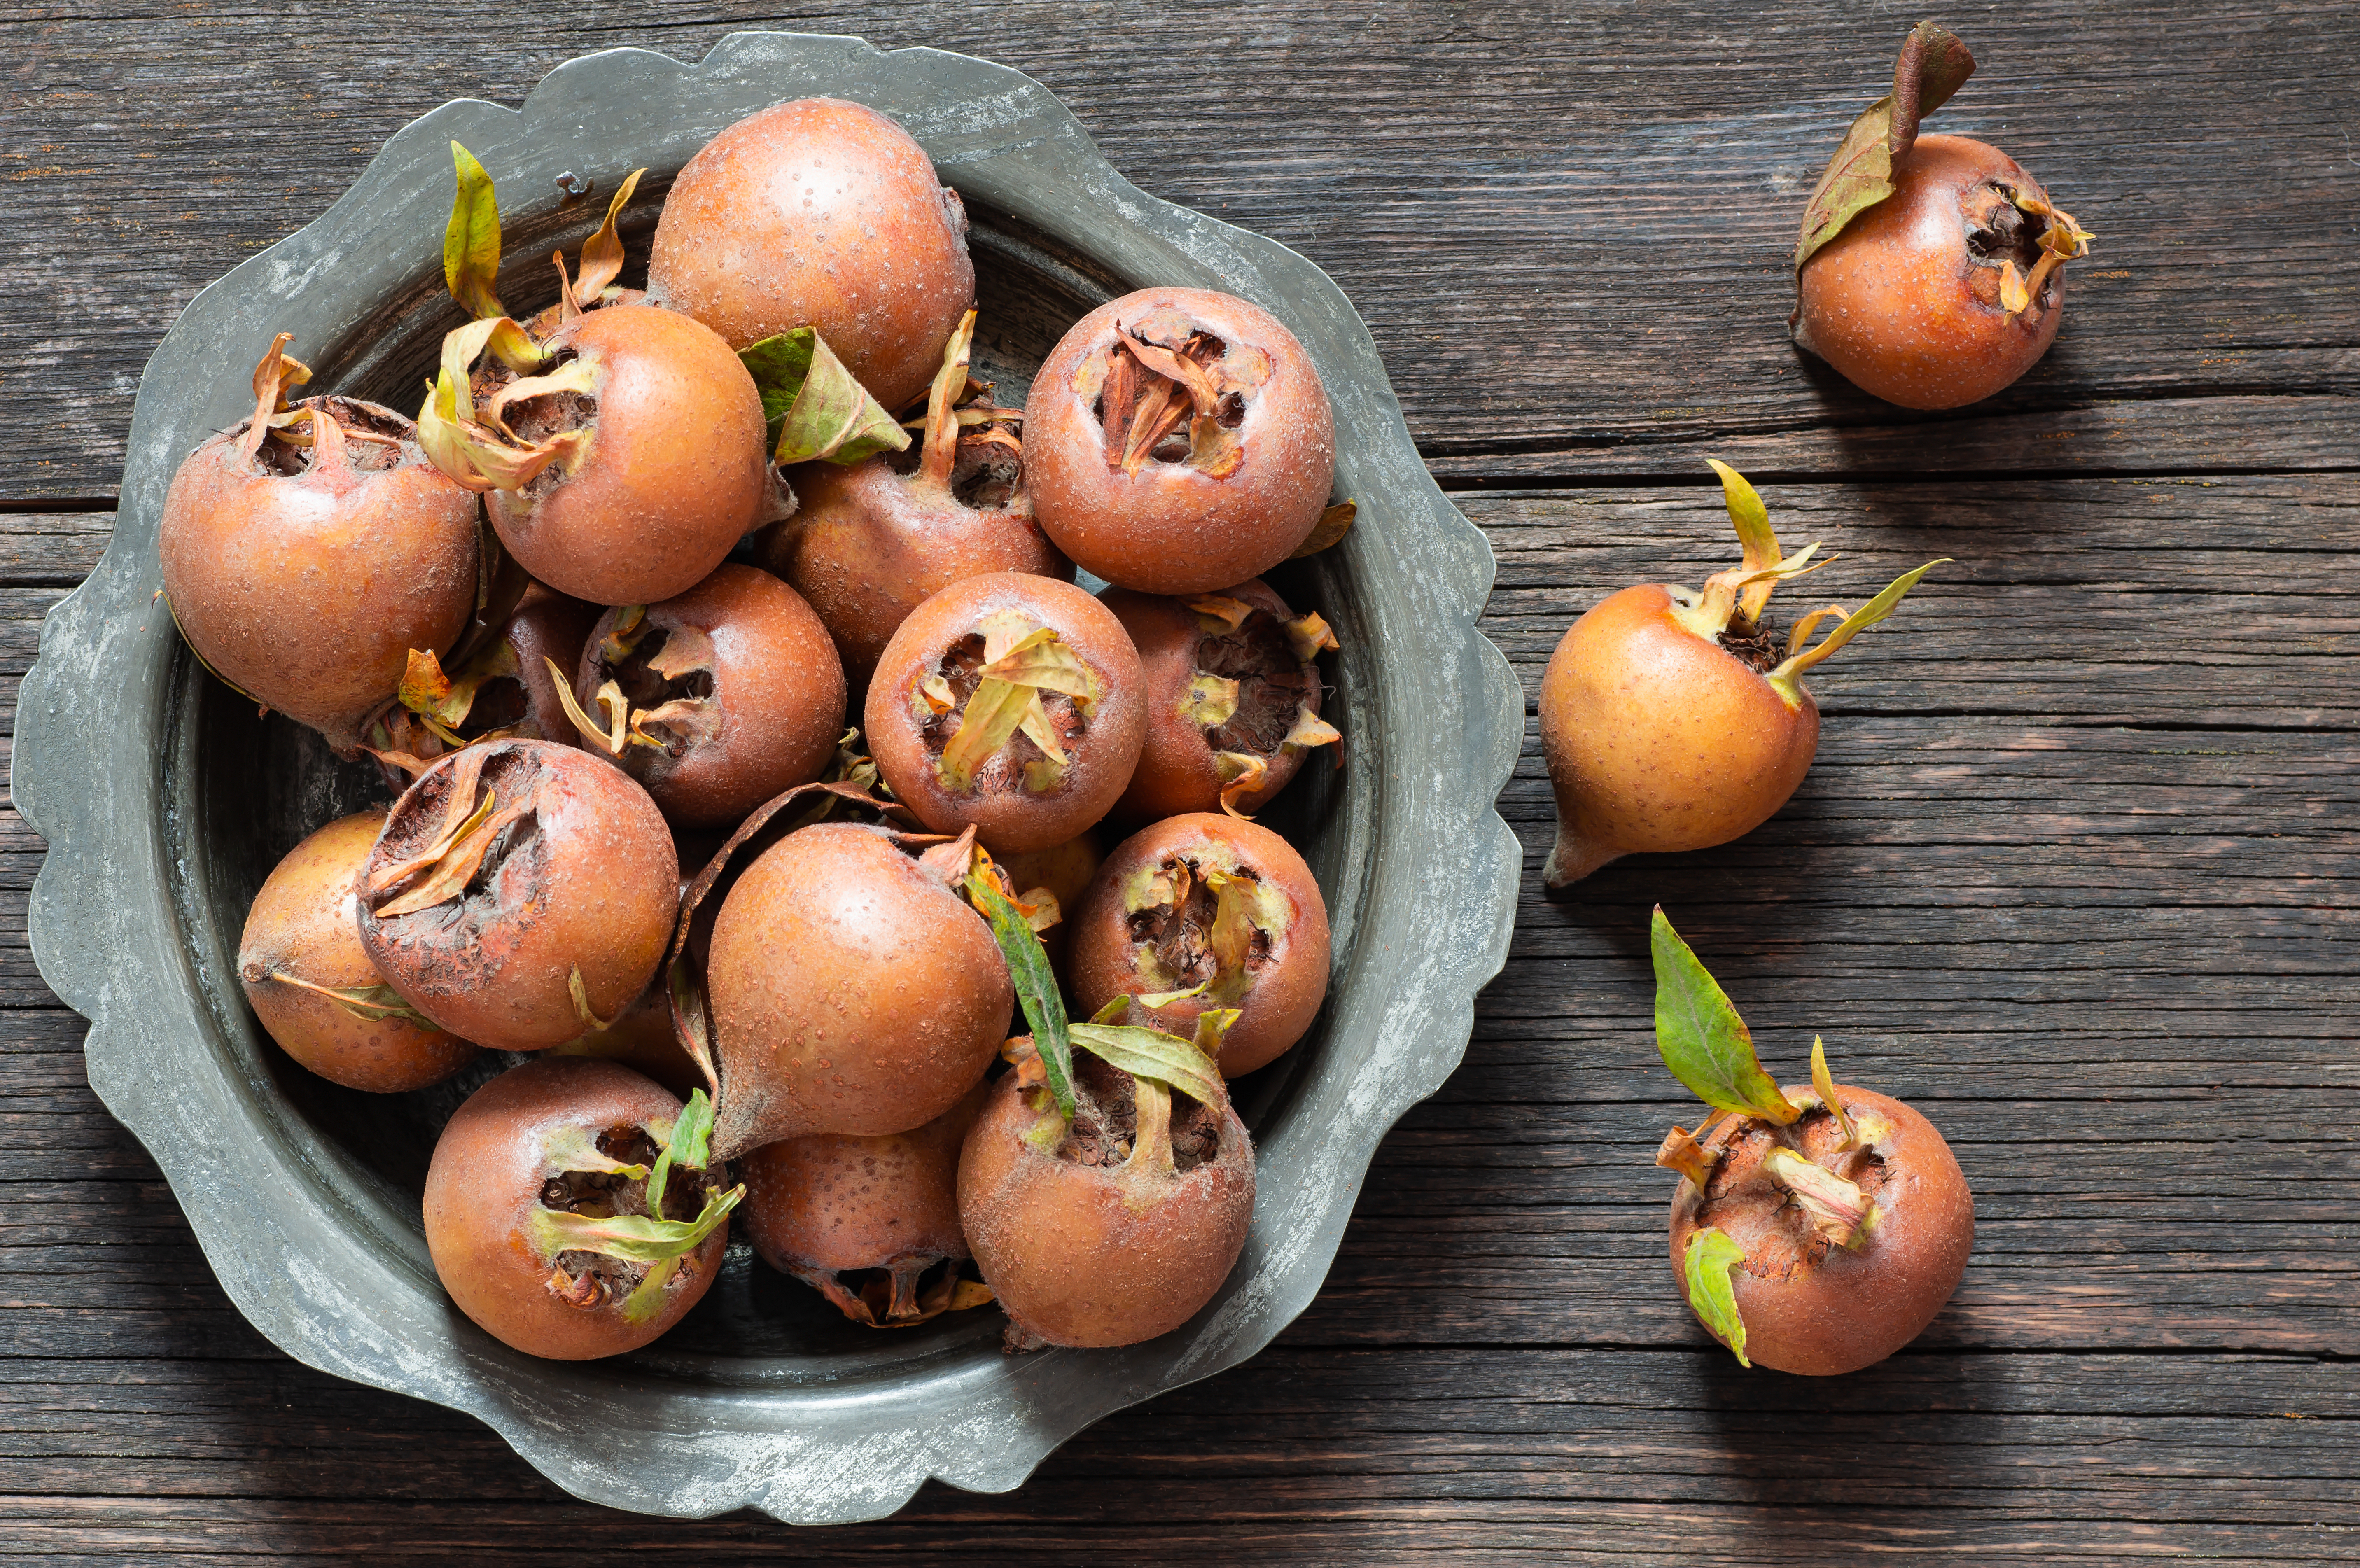
Medlar is a rare heritage fruit tree known for producing unusual small brown fruit that softens after harvest. This fruit category is tangy-sweet, useful for fresh eating, preserves, and baking, while its medlar watering guide calls medlar one of the most unique and historic fruit trees you can grow.
That “softens after harvest” part is one of the things that makes medlar different. It is not your typical bite-it-off-the-tree fruit. It is a fruit with history, character, and a reputation for old-fashioned preserves and specialty use. That makes it especially appealing to gardeners who enjoy heirloom varieties, uncommon fruits, and orchard plants that are a little outside the ordinary.
When Is the Best Time to Plant Medlar Trees?
The best time to plant medlar trees is during the dormant season or in early spring, before the tree is pushed into the stress of summer heat. Medlar trees are for USDA Zones 4 through 9, the practical planting window depends on how cold your winters are.
For warmer parts of that range, planting from late fall through early spring is usually ideal. For colder climates, early spring is often the safest move because it avoids exposing a newly planted tree to the harshest winter conditions right after planting. The goal is simple: give the tree a chance to root in before it has to deal with serious heat or serious cold.
A simple beginner guide looks like this:
- Zones 4 to 5: Early spring is usually the safest and easiest window.
- Zones 6 to 7: Late winter through early spring works well in many areas.
- Zones 8 to 9: Late fall through early spring is often ideal.
You are basically trying to plant when the tree can focus on root establishment instead of survival mode. That is always the smartest approach.
Why Medlar Trees Are Great for Beginners
Medlar trees have a lot going for them if you are new to fruit growing. They are compact, ornamental, cold-hardy, and as disease-resistant. They also fit smaller spaces better than many large fruit or nut trees, which makes them appealing for suburban yards, edible landscapes, and gardeners who want something interesting without needing a giant orchard.
Another big plus is that medlar is unusual enough to feel special without being impossibly fussy. If you want a fruit tree that does not look like what everyone else has planted, medlar scratches that itch in a big way.
Best Site Selection for Medlar Trees
Choosing the right planting site is one of the biggest decisions you will make. Fortunately, medlar is not too difficult here. Ty Ty’s medlar category says medlar trees thrive in full sun and well-drained soil, and Ty Ty’s medlar planting blog adds that they will tolerate partial shade and are adaptable to sandy or clay soils as long as they are not waterlogged.
Full Sun Is Best
Full sun is the best choice if you want stronger flowering, better fruiting, and sturdier growth. Partial shade is tolerated, but if you have a choice between a mediocre site and a bright sunny one, choose the sunny one.
Drainage Matters
Medlar trees do not want wet feet. Adaptable does not mean swamp-loving. They can handle different soil textures, but they still want a site that drains well and does not stay waterlogged.
Compact Size Helps
Ty Ty’s medlar category specifically highlights medlar’s compact size and ornamental appeal, which makes it a good fit for smaller gardens and edible landscaping. That does not mean you should cram it into a tight corner, but it does mean medlar is easier to place in the average home landscape than many big orchard trees.
Airflow Still Matters
Even with a relatively easy tree, good airflow is helpful. It reduces disease pressure, helps foliage dry out faster after rain, and makes long-term maintenance easier. Give the tree enough space to breathe.
Soil Requirements for Medlar Trees
The best soil for medlar trees is well-drained soil with a workable structure that allows roots to expand. Medlar trees prefer well-drained soil and Ty Ty’s medlar planting article says they thrive in well-drained loamy soils, while still being adaptable enough to grow in sandy or clay soils if those soils are not waterlogged.
That is a very beginner-friendly profile. In practical terms, you do not need magical soil. You need sensible soil. Soil that drains. Soil that is not brick-hard. Soil that is not permanently soggy. If you have average yard soil and decent drainage, you are probably in workable territory.
Ideal Soil Traits
- Well-drained
- Loamy if possible, but adaptable
- Able to hold moisture without staying soggy
- Loose enough for root expansion
- Not waterlogged
How to Prepare the Soil Before Planting
Soil preparation is one of those steps that feels boring until you realize how much easier it makes the next few years. A young medlar tree wants to root outward into the surrounding ground. Your job is to make that easy.
Start by clearing away grass, weeds, and debris from the planting area. Turfgrass is one of the sneakiest competitors a new tree faces because it steals both water and nutrients. Then dig a hole twice the size of the roots. Wider is better than tighter because it loosens the surrounding soil and gives the roots a friendlier place to begin expanding.
If your soil is compacted, break up that compaction in the planting zone. If your soil is sandy, stay especially attentive to watering after planting. If your soil is clay, drainage matters more. The goal is not to create some artificial underground potting-soil pocket. The goal is to make the transition into native soil easy and natural.
Medlar Tree Variety Recommendations by USDA Zone and Region
Ty Ty Nursery’s currently offers Breda Giant Medlar, Marron Medlar, and Royal Medlar, and all three are currently listed for USDA Zones 4 through 9.
That means the varieties are broad enough in hardiness that your recommendations can focus more on fruit style, intended use, and regional preference than on survival alone.
Breda Giant Medlar
Breda Giant is a strong option for growers who want a larger-fruited medlar type. Since it is listed for Zones 4 through 9, it works for a very broad stretch of the country, from cooler inland areas to much of the Mid-Atlantic and South.{index=10}
Marron Medlar
Marron is another flexible choice across Zones 4 through 9. It is a smart variety for growers who want a classic medlar experience and a hardy ornamental fruit tree that fits a wide range of climates.
Royal Medlar
Royal Medlar as produces large, round fruit with a rich, honey-sweet flavor, floral notes, and ripening in late spring to early summer, typically May through June. It thrives in a variety of climates and is a strong choice for both novice and experienced gardeners.
Practical Recommendations by Zone
- Zones 4 to 5: Breda Giant, Marron, and Royal are all currently listed as hardy options. Royal is especially appealing if you want a sweeter, larger-fruited selection.
- Zones 6 to 7: All three fit well. This is an easy medlar zone range where you can choose more by flavor and use than by survival.
- Zones 8 to 9: Breda Giant, Marron, and Royal are all listed as suitable, making medlar a realistic option for many warmer inland and transitional areas too.
Simple State Guidance
Because all three medlar varieties are currently listed for Zones 4 through 9, they are broadly suitable across many states in the Northeast, Mid-Atlantic, Midwest, Southeast, and parts of the South and lower Plains where those zone ranges apply. In cooler northern states, early spring planting is the safer move. In warmer Southern states, late fall through early spring gives you more flexibility.
If you want the easiest beginner recommendation, Royal Medlar is a very attractive starting point because its fruit size and flavor in more detail, which helps make the choice feel less abstract.
Pollination Requirements for Medlar Trees
From a beginner standpoint, planting two medlar trees is rarely a bad idea if space allows. It gives you backup, variety, and a more orchard-like setup. If you only have room for one, medlar may still be worth trying, but if your goal is to maximize your odds from day one, two is the smarter move.
How to Plant a Medlar Tree Step by Step
Now let’s get into the planting process itself.
When your medlar tree arrives, start by soaking the roots in a bucket for hydration. Ty Ty’s medlar watering guide specifically says to soak bare roots in clean water for 4 to 12 hours before planting, and not longer than 24 hours. That soaking step rehydrates the tree after shipping, stimulates dormant root cells, and helps reduce transplant shock.
- Soak the roots in a bucket for hydration. A 4 to 12 hour soak is a smart benchmark before planting.
- Dig a hole twice the size of the roots. A wider hole makes it easier for roots to spread naturally.
- Place a 1st Year Nutra Pro Fertilizer pak and a soil moist transplant mix at the bottom of the hole unopened. This gives the tree slow-release support without shocking the roots.
- Set the tree in the hole. Keep it upright and arrange the roots naturally.
- Back fill the hole with soil. Firm gently as you go so you remove major air pockets without over-compacting the soil.
- Water the tree in thoroughly. Ty Ty’s medlar watering guide says that first deep watering helps the soil settle around the roots, removes air pockets, and gets moisture to the full depth of the root zone.
- Install a Max Growth Tree Shelter. This helps protect your new tree and supports better early establishment.
Why Use Nutra Pro 1st Year Fertilizer Paks Instead of Granular Fertilizer?
The first year after planting is the year of root establishment. That is not the time to get aggressive with fertilizer. Young roots are tender. If they get hit with too much fertilizer too fast, they can burn.
That is why Nutra Pro 1st Year Fertilizer Paks make more sense in the first year. The pak’s micro porous holes let the tree feed slowly over time instead of dumping a strong dose of fertilizer into the root zone all at once. That slower release is exactly what a newly planted tree needs.
Granular fertilizer is much easier to misuse, especially for beginners. Too much granular fertilizer can burn roots, stunt growth, and in serious cases kill the tree. A young medlar tree does not need to be pushed. It needs to be established.
- Nutra Pro: slow, steady, safer first-year feeding
- Granular fertilizer: easier to overapply and easier to burn young roots
Root health first. Everything else later.
Ongoing Watering After Planting
Watering is one of the biggest keys to first-year success. Ty Ty’s medlar watering article says water is your medlar tree’s best friend during the transplant stage and emphasizes deep watering right after planting.
For the first two months, water your medlar tree every day or at least every other day, depending on rainfall. If the site dries quickly, stay on the more frequent side. If rain is regular and soaking, you can adjust.
If the tree begins to wilt, it is telling you it is thirsty and needs a drink. That is the tree communicating in the clearest possible way.
Once established, your watering schedule can taper back and depend more on rainfall and soil conditions. When fruiting starts in later years, water demand increases again because crops take moisture and energy.
Simple Watering Plan
- Water deeply right after planting
- For the first two months, water daily or every other day depending on rainfall
- Watch for wilt as a thirst signal
- Adjust based on soil type and weather
- Increase support when fruiting begins in later years
Remove First-Year Flowers
If your newly planted medlar tree begins to flower the first year, remove the blooms.
Yes, it feels backward. Yes, it is hard to do. But the first year is not about fruit. It is about root establishment. You want the tree building its underground support system, not spending energy on early fruiting.
Growing your own fruit is a marathon, not a sprint. Short-term gratification is not worth sacrificing long-term productivity.
Ongoing Maintenance for Medlar Trees
Once the tree is planted and settled in, medlar maintenance is pretty manageable.
Mulching
A light mulch ring helps conserve moisture and suppress weeds. Keep the mulch pulled back from the trunk so moisture is not trapped right against the bark.
Weed Control
Keep grass and weeds away from the base, especially during the first few years. Young trees should not have to compete with turfgrass for water and nutrients.
Protection
A Max Growth Tree Shelter gives the new tree some extra protection and can improve the first-year environment while it establishes.
How to Prune Medlar Trees
Pruning medlar trees is mostly about structure, airflow, and removing damaged wood. Ty Ty’s medlar pruning content emphasizes fall pruning for healthier growth and better fruit, which lines up with the general idea of using selective pruning to keep the canopy strong and manageable.
Basic Pruning Tips
- Remove dead or damaged wood
- Thin crossing or rubbing branches
- Improve airflow through the canopy
- Do not over-prune a young tree
- Focus on structure, not punishment
A little pruning each year is much easier than years of neglect followed by one giant correction.
Common Medlar Tree Problems and How to Handle Them
Transplant Shock
Some slow top growth after planting is normal. Medlar trees may spend more time establishing roots than showing off top growth at first. Stay steady with watering and avoid overfertilizing.
Wilting
Wilting usually means the tree needs water. Check soil moisture and respond quickly.
Poor Growth
If the tree seems stalled, review the basics: sunlight, drainage, watering consistency, weed competition, and whether the roots got stressed by too much fertilizer.
Pests and Disease
Medlars are disease-resistant, which is a nice advantage for beginners. That does not mean ignore the tree completely, but it does mean medlar starts with a reputation for being easier than many fussier fruit trees.
Where Is the Best Place to Buy Medlar Trees?
If you are ready to buy medlar trees online, Ty Ty Nursery is a strong place to start. Ty Ty Nursery currently offers prices up to 68% lower than competitors, fast in-season shipping, a Free 1-Year Plantsurance Guarantee, a Lifetime True-to-Name Guarantee, and live expert human customer support based in Ty Ty, Georgia. It also says the company has been growing locally for nearly 50 years and is recognized as a Google Trusted Store and a Newsweek Top Online Garden Center.
- Prices up to 68% lower than other nurseries
- Fastest in-season shipping so you can plant in days, not wait weeks or months
- Free one year Plantsurance guarantee
- Lifetime true-to-name guarantee
- No need to move heavy pots in and out of cars because trees ship right to your door
- Been growing locally since 1978 / nearly 50 years of experience
- Google 4.6 Trusted Store Rating
- Trustpilot 4.4 Excellent Rating
- BBB rating of A
- Live human plant experts in Ty Ty, GA
You can shop the live medlar category here: https://www.tytyga.com/Medlar-Trees-s/1858.htm
You can also read more growing content at https://blog.tytyga.com.
Final Thoughts
If you are a beginner and want a fruit tree that is different, beautiful, historic, and surprisingly manageable, medlar is an excellent choice. Give it full sun, well-drained soil, room to breathe, and steady first-year care. Soak the roots before planting. Dig a hole twice the size of the roots. Place a 1st Year Nutra Pro Fertilizer pak and a soil moist transplant mix at the bottom of the hole unopened. Back fill, water thoroughly, and install a Max Growth Tree Shelter.
Then stay patient. Water every day or every other day for the first two months depending on rainfall. Remove first-year blooms. Focus on root establishment first. Do that, and you give your medlar tree the kind of start that leads to long-term success.
And when you are ready to plant, shop medlar trees at Ty Ty Nursery.
Leave a Reply