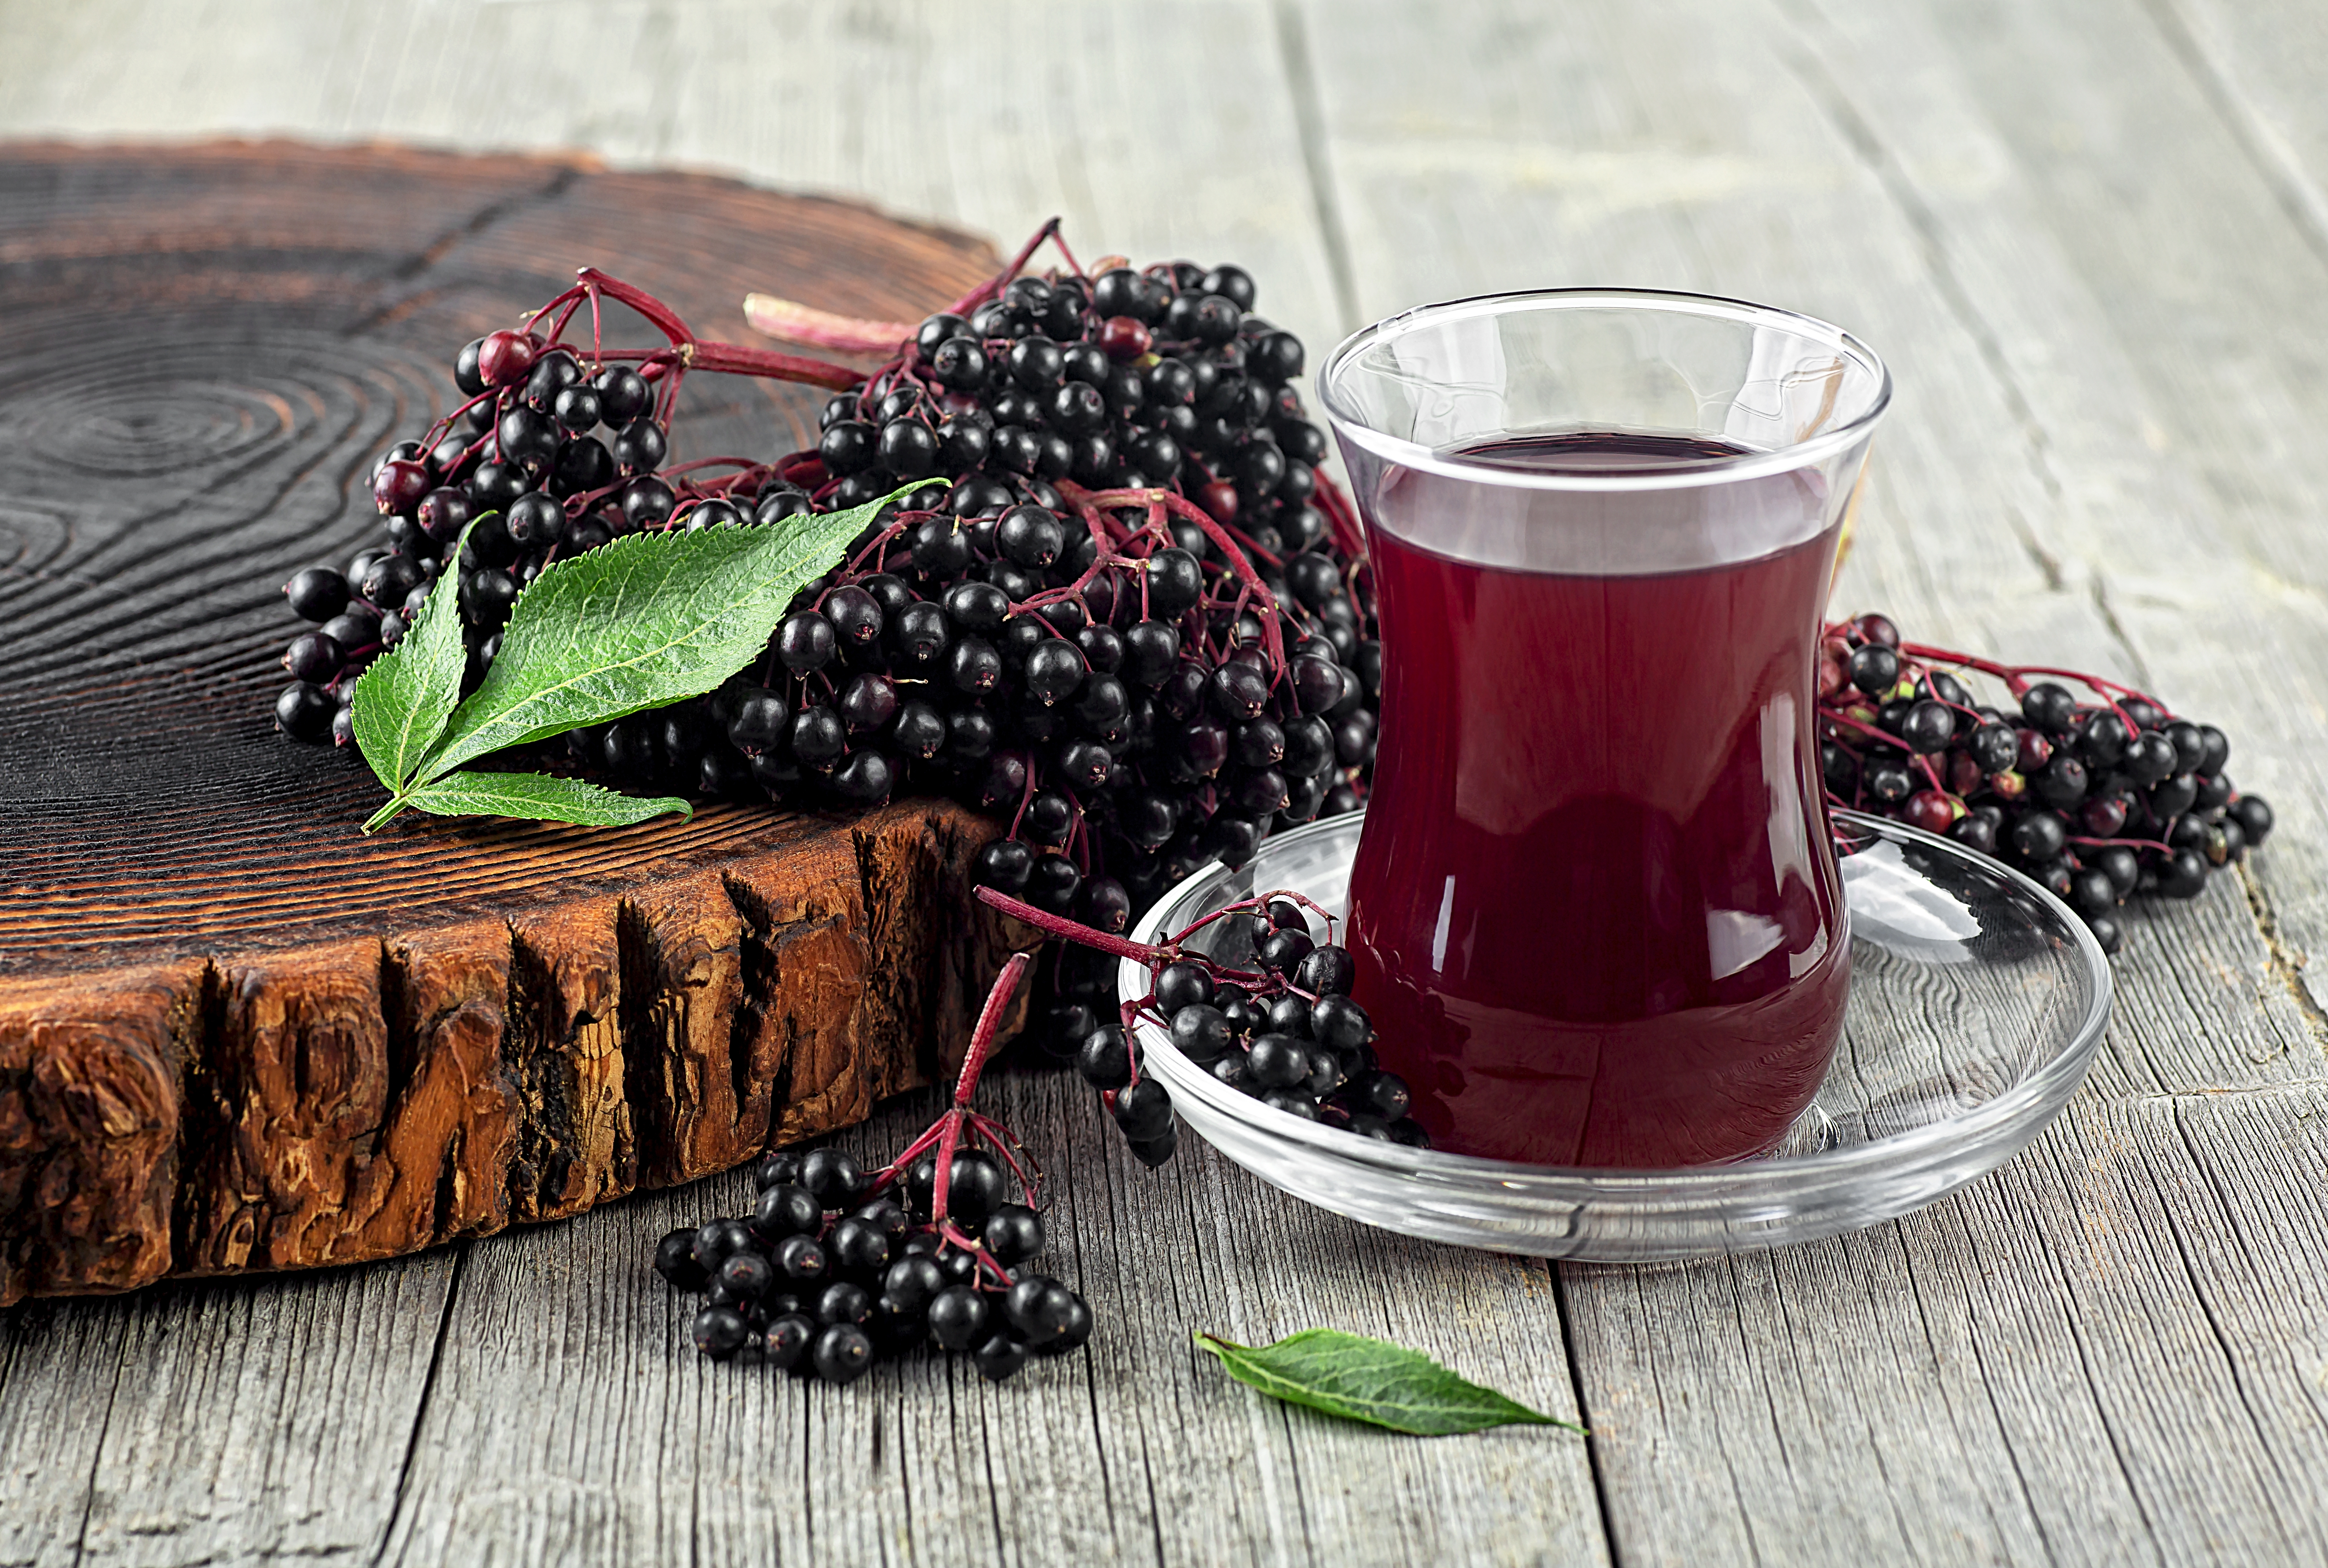
If you have ever wanted a plant that feels equal parts old-fashioned, useful, beautiful, and surprisingly easygoing, elderberry deserves a serious look. Elderberry plants bring clusters of creamy white flowers in late spring, rich dark berries later in the season, and a relaxed, cottage-garden look that somehow fits into edible landscapes, wildlife plantings, backyard berry patches, and even privacy-style shrub borders. They are productive without being fussy, ornamental without being high-maintenance, and practical enough to earn their keep in the garden year after year.
That said, elderberries do best when you understand a few basics before you plant them. The biggest beginner questions are usually simple: when should you plant elderberry bushes, where should you plant them, what kind of soil do they need, do they need a pollinator, and how do you care for them during the first year so they settle in well and produce heavily later on?
We are going to cover when to plant elderberry plants, site selection, soil requirements, soil preparation, USDA zone recommendations using the current elderberry listing from Ty Ty Nursery, pollination requirements, step-by-step planting instructions, watering, first-year flower removal, pruning, common elderberry problems, and long-term maintenance. By the end, you will have a full beginner-friendly roadmap for growing elderberries with confidence.
Why Elderberry Plants Are Worth Growing
Elderberries are one of those rare plants that bring beauty and usefulness at the same time. In late spring to early summer, they produce clusters of fragrant white flowers that attract pollinators. Later, the plants develop dark berries that are widely used in syrups, jams, jellies, wine, and cooked recipes. The current elderberry product page describes elderberry plants as hardy deciduous shrubs with lush foliage, showy flower clusters, and dark berries that support pollinators and wildlife while adding beauty to the landscape.
Extension sources also support their versatility. Penn State describes elderberry as both an ornamental and productive garden plant, while NC State lists American elderberry as a broad, adaptable native shrub that works in full sun or part shade and suits many landscapes.
When Is the Best Time to Plant Elderberry Plants?
The best time to plant elderberry plants is during the dormant season, usually from late fall through early spring, with early spring being the easiest and safest answer for many beginners. Planting while the shrub is dormant gives the roots time to establish before the plant has to support strong top growth, flowering, and fruit set. Elderberries are vigorous, but that does not mean they should be rushed into the ground under stressful conditions.
In colder climates, early spring is often the safest planting window because it avoids the harshest winter conditions while still giving the roots a good start. In milder climates, the dormant season is more forgiving, and late winter planting can work very well too. The simple beginner rule is this: plant elderberries while they are still asleep so they can wake up where they belong.
Current Elderberry Offering and USDA Zone Recommendations
The current elderberry listing from Ty Ty Nursery presents elderberry plants as suited for USDA Zones 3–10. Because the current page is a general elderberry product page rather than a long list of named cultivars, the practical beginner recommendation is straightforward: this current elderberry offering is the listed fit for outdoor growing across Zones 3 through 10, with local climate, drainage, and site quality determining how vigorously the plants perform.
USDA Zone 3
Typical areas: northern Minnesota, North Dakota, South Dakota, Montana, and colder interior mountain regions.
Recommendation: The current elderberry listing is broadly described as hardy to Zone 3–10, but extension guidance is a little more conservative in some regions, often centering reliable elderberry hardiness around Zone 4 and warmer. That means Zone 3 is more of a try-it-with-protection situation than a slam-dunk guarantee in colder winters. If you are in Zone 3, choose a sheltered site, mulch well, and expect some seasonal dieback in harder winters.
USDA Zone 4
Typical areas: northern Wisconsin, northern Michigan, northern New England, and similar colder inland regions.
Recommendation: Elderberries are a good fit here. NC State lists American elderberry as hardy through Zone 4, and Michigan State notes elderberry can be grown across much of Michigan, hardy to Zone 4a.
USDA Zone 5
Typical areas: parts of Pennsylvania, Ohio, Indiana, Illinois, Iowa, Missouri, Kansas, Colorado, Utah, inland Oregon, inland Washington, and southern New England.
Recommendation: Elderberries are well suited to Zone 5 and can make excellent backyard shrubs here when planted in full sun with good moisture and drainage balance.
USDA Zone 6
Typical areas: parts of Virginia, Maryland, Kentucky, Tennessee, Missouri, Arkansas, Oklahoma, and upland parts of the Southeast.
Recommendation: Zone 6 is a very comfortable elderberry zone. The plants generally establish quickly and grow vigorously if soil moisture is steady.
USDA Zone 7
Typical areas: Georgia uplands, Alabama uplands, South Carolina upcountry, North Carolina piedmont, Tennessee, Arkansas, Virginia, and Oklahoma.
Recommendation: Elderberries can do very well in Zone 7, especially when they are given fertile soil, moisture, and adequate airflow.
USDA Zone 8
Typical areas: much of Georgia, Alabama, Mississippi, Louisiana, Texas, South Carolina, Arizona, and parts of California.
Recommendation: Zone 8 is a strong elderberry zone in many regions, especially where plants receive enough moisture and are not left to bake in poor dry soil.
USDA Zone 9
Typical areas: southern Texas, southern Louisiana, parts of Florida, warmer parts of California, and other mild-winter regions.
Recommendation: Elderberries can still grow in Zone 9, especially where moisture and soil quality are managed well. The current product listing includes Zone 9 within its range.
USDA Zone 10
Typical areas: very warm tropical-adjacent climates.
Recommendation: The current product listing includes Zone 10, but the hotter and more tropical the site becomes, the more important it is to prioritize moisture, good soil, and some protection from extreme stress.
USDA Zone 11
Typical areas: tropical climates.
Recommendation: The current product listing does not include Zone 11, so this is generally not the recommended outdoor zone for the current elderberry offering.
Because many states span multiple USDA zones, always use your exact local zone first and your state second. In practical terms, elderberries are among the more adaptable berry shrubs you can grow, but they still perform best when matched to a good site and sensible moisture conditions.
Pollination Requirements for Elderberry Plants
This is one of the most important parts of elderberry growing for beginners. Elderberries may produce some fruit alone, but yields are significantly better when you plant at least two genetically different elderberry varieties for cross-pollination. Utah State says elderberries require cross-pollination between two genetically different varieties to produce a full crop and recommends planting at least two compatible cultivars within 60 feet of each other. Penn State says planting at least two increases cross-pollination and berry harvest and notes elderberries are wind-pollinated.
That means the safest beginner approach is not to plant one shrub and hope for the best. Plant at least two elderberry plants. Even if the current product page is a general listing rather than a detailed cultivar lineup, the principle still holds: more than one compatible elderberry usually means better berry production.
Site Selection: Where Should You Plant Elderberry Plants?
Elderberries do best in full sun with good moisture and drainage that is reliable without being bone-dry. This is one of the nice things about elderberries: they are more flexible than blueberries and less fussy than many fruit trees, but they still perform best when the site is chosen thoughtfully.
UNH Extension says elderberries grow very well in consistently moist, fertile soils, can tolerate occasional drought and temporarily wet soils, but are not a good choice for sandy or marshy spots. NC State says American elderberry can grow in full sun or partial shade, and UC IPM says elderberries do well in full sun or light shade with moderate to regular water.
That means the ideal site is sunny, fertile, and evenly moist without being waterlogged. Good elderberry sites include:
- A sunny edge of the garden with rich soil
- A berry patch with reliable irrigation
- A landscape bed that holds moisture reasonably well
- A slight berm or raised row if your site tends to stay wet after rain
If you have a site that is hot, dry, sandy, and neglected, that is not the best place for elderberries. If you have a site that stays swampy for long periods, that is not ideal either. Elderberries like balance: moist, fertile, breathable soil.
Soil Requirements for Elderberry Plants
Elderberries prefer fertile, moisture-retentive, well-drained soil with a slightly acidic pH. UNH says slightly acidic soil in the 5.5 to 6.5 range is ideal. West Virginia University says elderberries require slightly acidic soils and will grow within the 5.5 to 6.5 pH range. Michigan State says elderberry requires soil pH between 5.5 and 6.5.
That means the ideal elderberry soil is:
- Fertile
- Moist but not waterlogged
- High in organic matter
- Slightly acidic, ideally around pH 5.5 to 6.5
One of the nice surprises for beginners is that elderberries tolerate more soil variation than some other berry crops. NC State lists them for clay, loam, sand, and high organic matter soils, with good drainage to occasionally wet conditions. But “tolerates” is not the same as “thrives anywhere,” so if you can give them rich, workable soil, they will reward you for it.
How to Prepare the Soil Before Planting
Start by clearing the planting area. Remove grass, weeds, and debris. Loosen compacted soil. If your ground tends to stay wet, Michigan State recommends planting on a berm to increase the chance of success in poorly drained soils. That is a smart move for elderberries because they appreciate moisture but do not want to sit in stagnant water.
Adding organic matter to the broader planting area can help improve both moisture retention and soil structure. Elderberries are one of those shrubs that really appreciate a soil that feels alive and workable rather than stripped-out or compacted. The point is not to create one tiny luxury pocket in the planting hole. The point is to prepare a real growing zone where roots can spread and settle in.
How to Plant Elderberry Plants Step by Step
Now for the hands-on part. If you are planting a bareroot elderberry plant, here is the beginner-friendly planting method:
- Soak the roots in a bucket of water for hydration. When your elderberry arrives, soak the roots in a bucket of water to help rehydrate the plant before it goes into the ground.
- Dig a hole twice the size of the roots. Give the roots room to spread naturally instead of forcing them into a cramped planting hole.
- Place one unopened 1st Year Nutra Pro Fertilizer Pak and one unopened Soil Moist Transplant Mix at the bottom of the hole. Leave both unopened and place them at the bottom of the planting hole.
- Set the plant in place. Position the roots naturally and keep the plant upright.
- Backfill the hole. Refill the hole with the soil you removed.
- Water the plant in thoroughly. This helps settle the soil and remove air pockets around the roots.
- Install a Max Growth Berry Shelter. This adds protection while the young plant is getting established.
That is the basic formula: hydrate, dig, place the unopened inputs, backfill, water, and protect.
Why Use Nutra Pro 1st Year Fertilizer Paks Instead of Granular Fertilizer?
The first year is not the time to get aggressive with fertilizer. Young elderberry roots are tender, and too much fertilizer too quickly can damage or stall the plant. A slow, controlled approach makes far more sense than dumping granular fertilizer into the planting zone and hoping the rate is right.
The reason to use Nutra Pro 1st Year Fertilizer Paks instead of granular fertilizer is that the pak feeds slowly through micro porous holes. That slow release supports the plant gradually without burning the roots. Granular fertilizer the first year is easy to overapply, easy to place too close to the roots, and easy to use badly enough to stunt the plant or kill it. Year one should be about safe root establishment, not forcing an oversized top flush of growth.
Watering Elderberry Plants After Planting
The first two months after planting are critical. For the first two months, water every day or at least every other day, depending on rainfall, temperature, wind, and soil type. If the weather is mild and rainy, you may not need daily watering. If it is hot, dry, or your soil drains quickly, you may need more frequent attention.
If the plant begins to wilt, it is telling you it is thirsty and needs a drink. Newly planted elderberries do not yet have a broad established root system, so they depend on you during that first stretch.
Once established, watering can taper back and become more rainfall-dependent, but elderberries remain moisture-loving shrubs. UNH says they grow very well in consistently moist, fertile soils, and UC IPM recommends moderate to regular water. Increase water attention once fruiting starts because crop development demands moisture.
Should You Remove Flowers the First Year?
Yes. If your elderberry begins to flower in the first year after planting, remove the blooms.
This may feel wrong because flowers mean berries are trying to happen. But the first year is not about harvesting fruit. The first year is about root establishment and building a strong shrub. Grow your own fruit is a marathon, not a sprint. Short-term gratification is not worth weakening long-term production.
Ongoing Maintenance for Healthy Elderberry Plants
Pruning
Elderberries respond well to pruning, and pruning helps keep them productive. UC IPM recommends keeping elderberries dense by pruning out older stems. Penn State notes that older, less productive canes can be removed to encourage younger growth, and many growers manage elderberries as renewal-pruned shrubs rather than letting them become an aging tangle of stems.
For beginners, the easy version is this:
- Remove dead, weak, broken, or diseased wood.
- As the plant matures, remove older stems to encourage fresh new growth.
- Keep the shrub open enough for airflow and light.
Mulching
A mulch ring helps conserve moisture, suppress weeds, and moderate soil temperature. Just keep mulch from piling directly against the crown.
Weed and Grass Control
Do not let turf grow right up to the base of the plant. Young elderberries do not need extra competition while they are getting established.
Common Elderberry Problems and How to Treat Them
Aphids
Aphids can gather on new growth and distort leaves. University of Maine says aphids can often be washed off with a strong spray of water, and insecticidal soap is another option when needed. Encouraging beneficial insects can also help.
Spotted Wing Drosophila
This pest is a real concern in elderberries. Ask Extension specifically notes that elderberry is a target of spotted wing drosophila. If you are in a region where it is active, keep an eye on ripening fruit and harvest promptly.
Mummy Berry, Root Rot, and Stem Problems
While elderberries are not as notoriously disease-prone as some berries, moisture imbalances and poor airflow can still create trouble. Good site selection, airflow, cleanup, and pruning go a long way. If the soil stays too wet for too long, root stress becomes more likely.
The best beginner habit is simple: walk your elderberries often. Look at leaf color, moisture, flower set, cane condition, and fruit development. Most problems are easier to manage when you catch them early.
Best Place to Buy Elderberry Plants Online
If you are looking for the best place to buy elderberry plants online, Ty Ty Nursery is a strong choice for beginners and experienced growers alike.
Here is why Ty Ty Nursery stands out:
- Prices up to 68% lower than other nurseries
- Fastest in-season shipping so you can plant in days instead of waiting weeks or months.
- Free one year Plantsurance guarantee
- Lifetime true to name guarantee
- No need to move heavy pots in and out of cars because plants ship right to your door.
- In business since 1978
- Google Quality Store Rating of 4.5
- Trustpilot Excellent Rating
- BBB currently shows an A rating
- Live human plant experts in Ty Ty, Georgia
You can browse the current elderberry listing here: Elderberry Plants at Ty Ty Nursery.
Final Thoughts
Elderberry plants are one of the most rewarding shrubs a beginner can grow because they bring flowers, berries, wildlife value, and edible potential all in one plant. They are adaptable, but they still reward good planning. Plant in full sun. Give them fertile, slightly acidic, moisture-friendly soil that still drains well. Plant at least two for better pollination and heavier crops. Water carefully during establishment. Remove first-year blooms. Prune for renewal as the shrubs mature.
Do those things well and your elderberries will not just survive. They will become one of the most useful and satisfying parts of your landscape.
Ready to get started? Explore the current elderberry listing at Ty Ty Nursery, browse the Ty Ty Nursery Planting Tips page, and visit the Ty Ty Nursery homepage for more berry plants, fruit trees, and growing resources.
Leave a Reply